
TODAY IS THE DAY!
We’re debuting Part I, of our 3-part series featuring easy DIY and budget friendly ways to take your builder kitchen and give it a designer feel
My goal for this series is to give you simple, yet impactful ideas to tackle in your own space!Stay tuned for phase two and three where we get even more creative with this space!

Backsplash
Adding a tile backsplash was deffinitly the most transformational change we’ve made to our kitchen!
We had so much fun working with our friends at The Tile Shop on this project. Not only did they have an incredible selection of tile for us to choose from, but their customer service is exceptional and quite frankly a treat! Take it from me, a now converted “big box” home improvement store tile shopper!
For this update we knew we wanted to go with a clean, classic subway tile. The biggest reason for this is that our existing granite countertops are a bit “busy”. So we thought a crisp ivory subway tile, with a darker contrasting grout would be a great combination for the space. In addition, we decided to take our backsplash floor to ceiling to create a bold feature wall, and you guys I am so glad we did because it’s one of my favorite kitchen features!
The selections we went with turned out perfect mix of farmhouse charm, modern accents, and rustic touches. We couldn’t be happier with the result!
SUBWAY TILE // Imperial Bone Gloss Ceramic Wall subway Tile from The Tile Shop
GROUT // Grout Solutions in color NEW TAUPE from Home Depot
Lighting
Don’t underestimate the power of a pendant…
Swapping out our kitchen island pendants was the very first change we made in our new home. The original pendants made absolutely no sense, and I mean NO sense, so they had to go!
Builder’s often select “standard” readily available lighting fixtures for their builds. So unless you’re paying for an upgraded lighting option/package, you’re stuck with the “entry level” go-to budget friendly look. No thanks!
Selecting a more modern style pendant, with a traditionally “rustic” finish like oil- rubbed bronze not only helped to tie in the hardware and finishes used through the home, but gave them a new more modern and chic twist. I love the pendants we chose, they’re a seriously affordable designer dupe and is available in three finishes!
Faucet + Hardware
Updating your kitchen fixtures is a no-brainer when it comes to easy and impactful changes.
Updating your hardware, and your kitchen faucet tops the list as the easiest DIY change you can make to a kitchen. Both in our current kitchen and our last kitchen we swapped out the existing faucets for a more modern and commercial style faucet. Not only does it make the space look more high end, they’re super functional! Available in several finish options, the faucet we went with is under $100 and we love it!
We have yet to update our hardware, trust me I’ve tried! But just haven’t quite yet found the right combination between pulls and knobs. But stay tuned, that swap will be included in the next phase of the kitchen transformation!
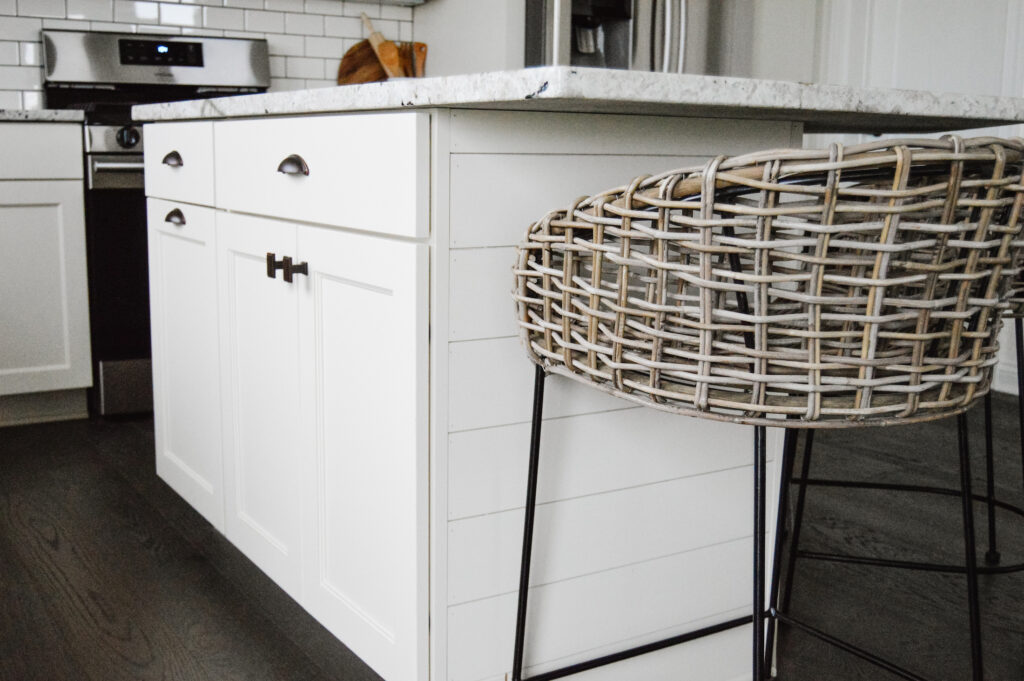
Kitchen Island
Surprise! This last minute DIY feature was as easy as they get and so impactful!
This truly was a spur of the moment project. We’ve been going back and forth about adding shiplap to the wall, or board and batten, and early yesterday morning I decided to nix the ship-lap on the wall idea and instead add it to our kitchen island! I documented the process beginning to and and plan to share a more detailed post tutorial later this week! I just love how adding this feature instantly upgraded our otherwise boring corner island, and we all know how I feel about corner islands ( rolls eyes.) Stay tuned later this week for more info on how we tackled this DIY!
That’s all she wrote! Literally. Stay tuned for follow up tutorials, and the next phase of this project where we’re going to transform some of the existing cabinetry! Shhh don’t tell my husband…